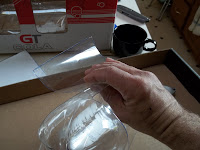
Here are the instructions for making a germination bin from a 2 Liter plastic bottle.
- Fold a piece of paper in 4ths. cut one of the 4ths out. This is the template for the door on the bottle.
- Place the paper on the side of the bottle and with a marker trace 3 sides of the square.
CAREFULLY! CAREFULLY!! Cut the 3 sides with a razor knife.
- Now lift the door you have just created and nearly (but not quite) crease it backward. This will allow easier access. Also then, reverse curl the door as to relieve the tendency to curl in.
- This is what it should look like after the above steps.
Now take a 3 inch piece of Duct Tape and stick half to the Center bottom edge of the door. Then Fold about a half inch of the tape unto itself to create a pull handle.
- Now Place several layers of paper towel, napkins or a cloth (your choice) in the bottle to where it only fills the bottom horizontal round half way. Saturate the towels with water, (do NOT puddle). Place seeds on towel and close bottle.
- Close and stick door shut ... place in a warm place and check every couple days to make sure the towels are still wet. If they need water then use a spray bottle and wet it down. I have found that a spray bottle is easiest, but do it how you like.
- IMPORTANT!!!! Always label and date your bin and don't mix seeds, so you always know what you have.
Here are 2 alternate seed germinating bins, I use this style when I have fewer seeds of a variety to germinate. One is a 2 Liter bottle cut and inverted and the other is a plastic pint food container that had something from the deli (food) in it originally. In a container like the pint one, poke some slit holes in the top so it will breath some. This will also allow you to add water (if needed) without removing the lid. Remember NOTHING FANCY, keep it simple. Re-Purpose, Re-Use, Recycle!!!


No comments:
Post a Comment